
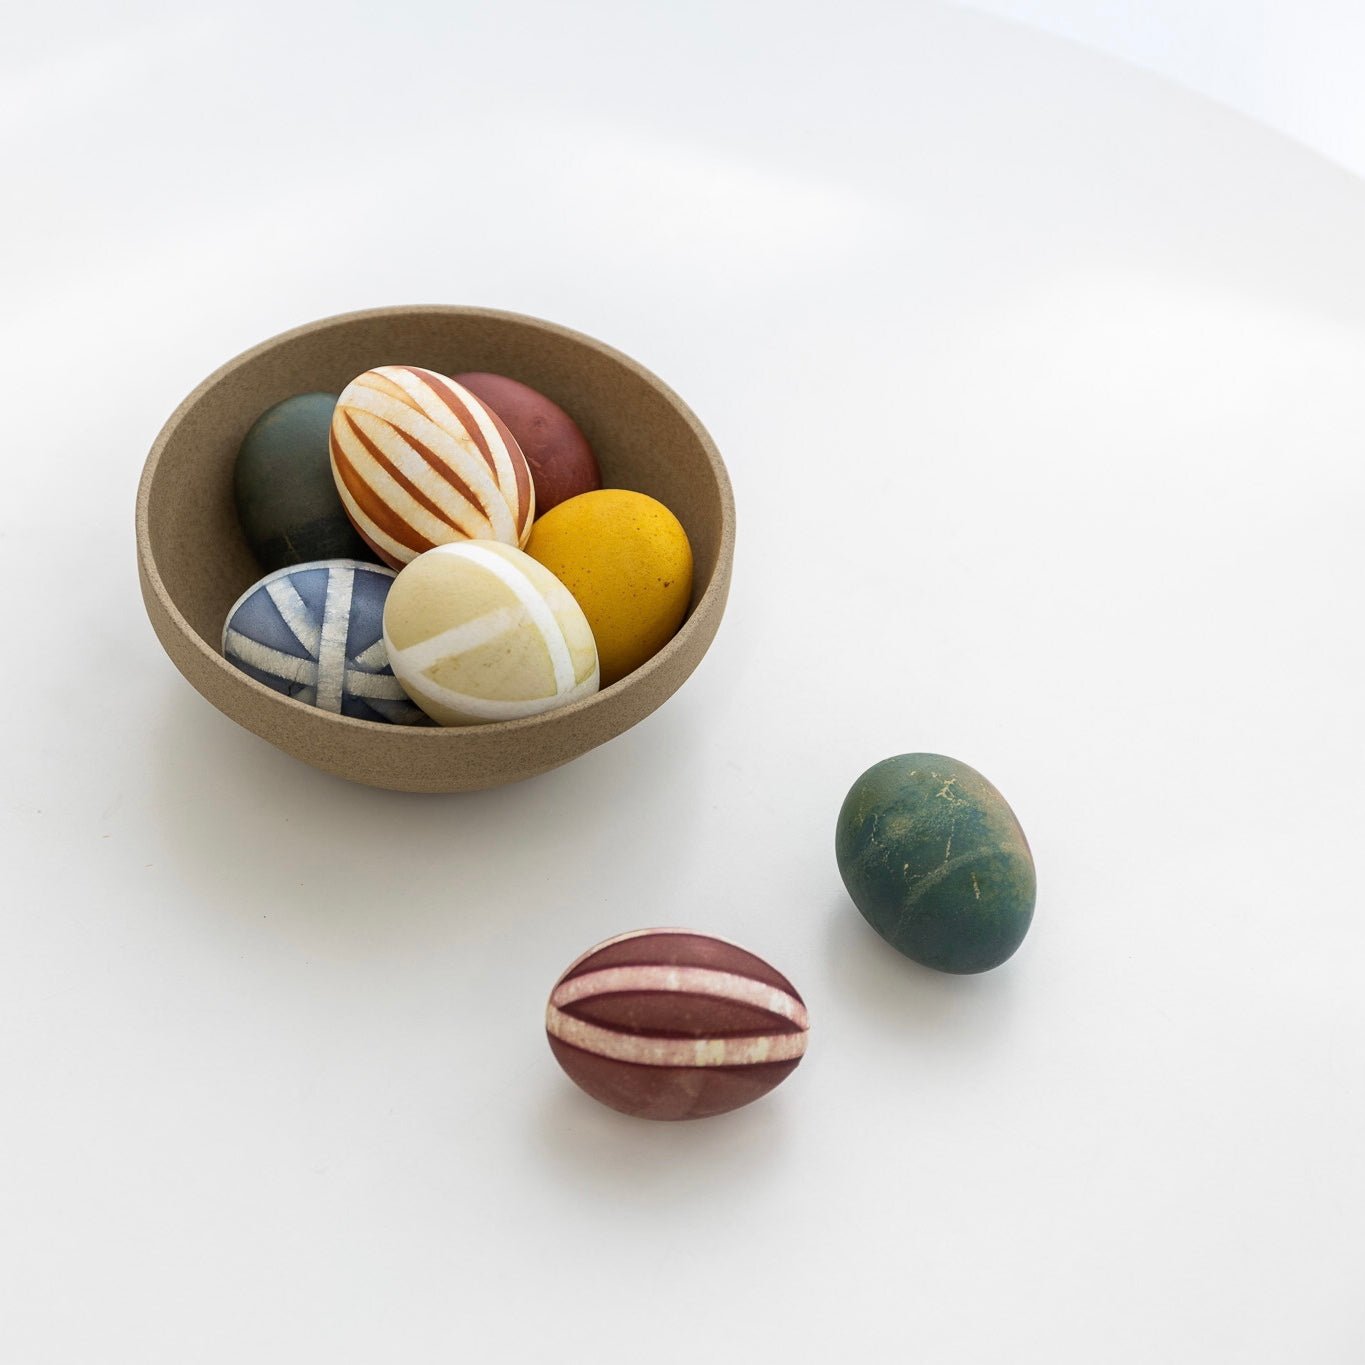
The return of spring brings with it a bounty of colors, and we're inspired to celebrate with this simple and fun craft project using natural dye. At Tortoise we always keep a design conscious eye, so we love using TGS products in multi-functional ways like these rustic natural-dye eggs!

The effect of natural dye depends largely on the concentration of the dye solution as well as the frequency and duration of the dipping. We found that the number of dips played the biggest factor in creating vibrant eggs. For materials, try to always err on having more of a natural ingredient than less in order to make a highly concentrated solution!

Ingredients:
- Unpeeled, hard-boiled white or brown eggs at room temperature
- 1 cup of chopped purple cabbage per cup of water = blue (white egg) green (brown egg)
- 1 cup of red onion skins per cup of water= lavender or red
- 1 cup of yellow onion skins per cup of water = orange (white egg) rusty red (brown)
- 1 cup of shredded beets per cup of water= pink (white egg) maroon (brown egg)
- 1 cup of blueberries per cup of water = blue (white egg)
- 1 cup of lemon peels per cup of water = pale yellow (white egg)
- 2 tablespoons of ground turmeric per cup of water = yellow (white egg?)
- Add 1 tablespoon of white vinegar per cup of stained dye liquid
- For every dozen eggs, plan on using at least 4 cups of dye solution
Equipment:
- Sori Yanagi Stainless Steel Deep Pan
- Sori Yanagi Stainless Steel Sauce Pan
- Sori Yanagi Stainless Steel Large Bowl
- Sori Yanagi Stainless Steel Large Strainer
- Sori Yanagi Stainless Steel Tongs with Holes
- Rabbit Soy Sauce/Creamer Pot
- HASAMI PORCELAIN 3'' plates
- HASAMI PORCELAIN 5'' plates
- HASAMI PORCELAIN 10'' plates
- HASAMI PORCELAIN Deep Round Bowl 7.3/8''
- HASAMI PORCELAIN Round Bowl 5.5/8''
- Tenugui Multi-purpose Cloth - Cedar
- Kinto Glass Coffee Cups (Available only in-store)
- Kosuga Bamboo Tiered Tray - Medium

Instructions:
1. Gather your ingredients. Dice, chop up and/or portion out your ingredients using the ratios given above.
2. Pour 1 to 2 cups of water into a sauce pan, then add the dye matter (cabbage, onion skins, turmeric) in the ratio given above, and bring the water to a boil.
3. Turn the heat down to low, and simmer. Keep it covered and cook your solution for 20 to 30 minutes.

Continued...
4. The dye is ready when it reaches a hue a few shades darker than you want for your egg. Check the color by dripping the dye onto a white dish. The longer you cook, the darker the dye. When the dye is as dark as you like, remove the pan from the heat and let the dye cool to room temperature. It may take 20+ minutes.
5. Pour the cooled dye through a fine mesh strainer into a bowl, and stir in the vinegar. Use 1 tablespoon of vinegar per cup of strained liquid. Pour the dyes in smaller bowls, and prepare them for dipping. You can lay newspaper underneath to make it easier to clean up after.
6. Next, decorations! Take blue tape and cut them into thin strips, dots, or squares. Get creative! Take the tape and lay them in your chosen designs on the eggs. Once ready, place the eggs carefully in the bowls of dye so that they're completely submerged.

Continued...
7. Keep the eggs in a cool place as they lay submerged. This means that you can transfer them to the fridge or place them in a shady cool spot until the desired color is reached.
8. The eggs are absorbing color. Once they've been submerged for a bit of time, carefully remove the egg from the bowl and let them air dry. To increase the vibrancy, go back for multiple dips. Drying thoroughly between each take. Dyeing multiple times will make the color stronger.
9. Once the desired color is achieved, take the egg out and let it air dry thoroughly. Natural dyes fade with time, so rub a neutral oil like canola or grape-seed into the surface or spray with matte or glossy acrylic. Store the eggs in the fridge or keep in a cool dry place. Peel off the tape once the egg is dry and already coated in oil.

Tips:
Although natural dye is safe, they will stain clothing and skin. We recommend wearing old clothes and laying newspapers down for easy clean-up. Use the original egg carton to hold the eggs in place if you'd like.

Final Thoughts:
We found that the onion skins and lemon had a faint color after the dyeing process was complete (but turmeric brought out a great yellow). We loved the appearance of blueberries and beets the most! Everyone's eggs will be trial and error, and most likely you'll have your own favorites in the end. Be curious and keep experimenting!

Rubbing with oil when finishing will keep the eggs shiny, and the eggs (once dyed and dried) will be okay in the fridge for up to 5 days.

We hope you have fun doing this project with your little ones. We'd love to see how your creations turn out–simply tag @tortoisegeneralstore to share your creations with us!

